By Harry Martin
It is widely assumed that to get a good quality print of a photograph, you need to be using a top of the range professional camera, edit the image on a computer, and then get it printed professionally in a big lab. To a certain extent, this is always going to ring true – if you want the best possible quality and very large print sizes then you are going to have to use the best equipment available.
However! Don’t underestimate what a mobile phone can produce. These days the quality of image produced by the tiny sensors in our phones is quite remarkable. Whilst there are certain limitations to pictures taken on very small sensors (check out this blog) you can get acceptable quality out of most smartphone cameras and, by extrapolation, good quality prints.
Shooting On Your Mobile Phone
By default, most smartphone cameras will give you a JPEG image straight up. Newer iPhones will give you a funky HEIC format but, in essence, these are all variations of a compressed image format. Some smartphones, either through the use of photography apps or natively through their own software, will let you capture RAW images.
If you’re not sure on the difference between RAW and JPEG files then read this.
The RAW files may be the same size physically or digitally (in terms of dimensions and size in pixels) but you will achieve greater dynamic range and have more flexibility with editing by shooting in RAW, thus giving you full control over how you want your image to look. This is an overarching principle in all photography genres. You, the photographer, need to have as much control over each process as possible.
Since I have a subscription to the Adobe Creative Cloud, I have the Lightroom app installed on my phone. Many people don’t realise you can access your phone’s camera through the Lightroom app, giving you access to a few more advanced controls in capturing images. In addition, it lets you record those images in the DNG format – Adobe’s version of RAW.
If you shoot on an iPhone then there are a whole range of apps which will enable you to capture RAW images, including Halide camera and ProCam 7. For an official list from the App Store check out this link. If you’re an Android user there are also plenty of options such as VSCO and Snapseed, both of which also offer powerful editing tools once you’ve captured your image.
Remember, while your phone might have a lovely bright screen which is backlit, a physical print relies on light falling on its surface. I recommend turning the screen brightness down to about midway to make sure you don’t end up with a really dark print. If you are more comfortable editing on a big screen, just send your file over to a computer. If you are happy with the aesthetic and look of the JPEG images straight from the phone, then don’t worry too much and use those files. Do a comparison of the RAW files from your phone and the JPEG files it captures natively if you aren’t sure what might be best.
How Big Can I Print?
This question comes up a lot and generates a lot of confusion. I’m going to keep it as simple as I can here, though you can go into a fair amount of detail on this topic. The size of print you can produce is mainly limited by two factors: 1) The digital dimensions of your image, i.e. the pixels. 2) The pixels per inch, or PPI, you print at.
Let me address both those points. Firstly the dimensions: Each camera’s sensor has a “resolution” – the number of megapixels it contains. This is what determines what size your digital image is. A megapixel is 1 million pixels, and is an area of measurement. So if your camera has 10 megapixels the pixel dimensions of your image are going to be 3872 x 2592 (assuming it is a camera capturing in the 3:2 aspect ratio). If your camera has 20 megapixels you have an image of 5380 x 3620 pixels. The more megapixels a camera has, the larger the file it produces.
When you choose to print an image you have to tell your computer’s software how many pixels per inch you would like displayed. Typically the best results are obtained if you choose to print at 300 PPI.
So to find out how large your pictures can be printed, just divide your images pixel dimensions by this 300 PPI number. So if we use our 20-megapixel example:
3872/300 = 12.9 inches
2592/300 = 8.64 inches
Therefore, a 20-megapixel camera will produce a 13” x 8.6” at the best quality. You can choose to reduce the PPI value. This will reduce the quality of the print but you can often get away with a value down to about 240/250. In this example, this could increase the size of a possible print to about 16” x 11”. You may now see why many photographers favour high-resolution cameras and rave about the advantages they offer. They will enable you to print very large images, if that is your goal.
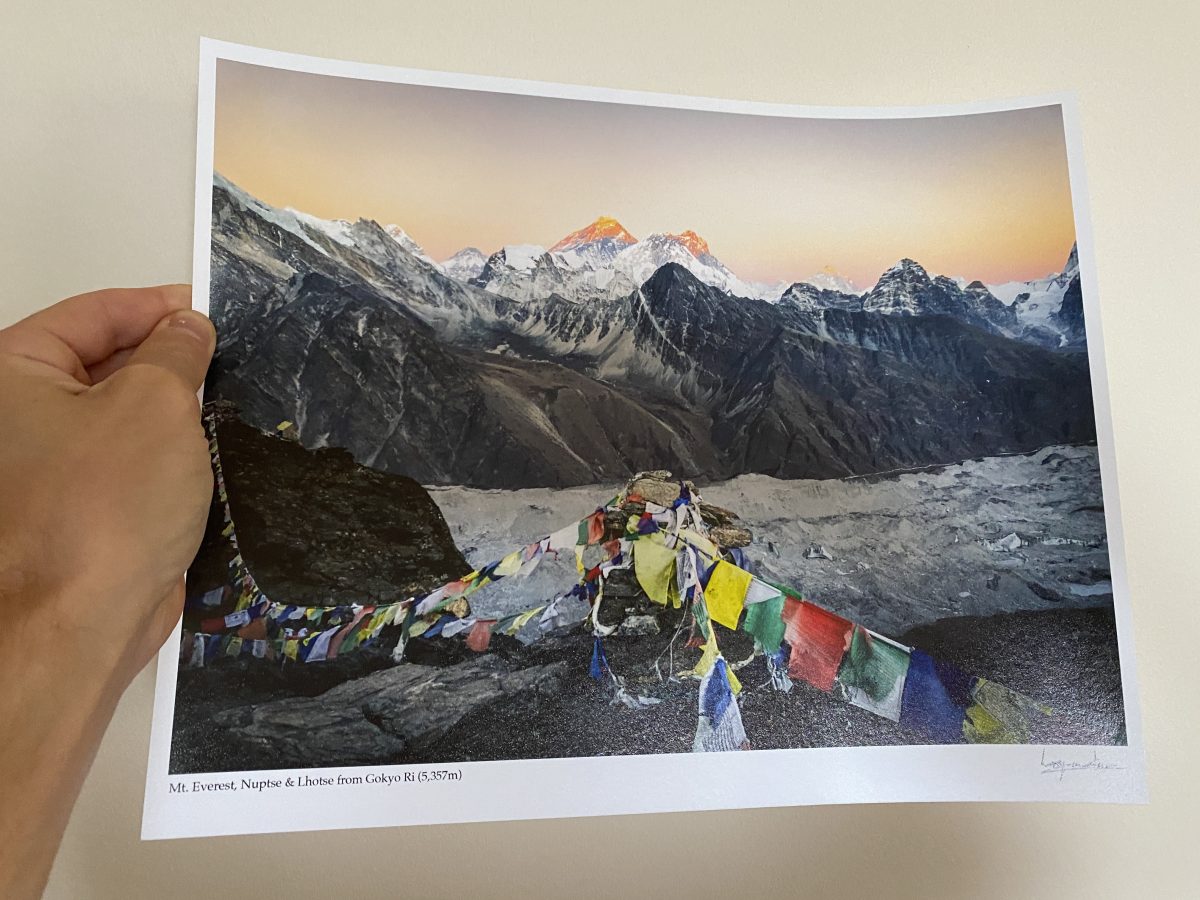
Let me return to images taken on smartphones then. I took the photograph below while travelling through the Himalayas. Up at high altitude, I did not want to lug my large camera kit with me, and so opted just to use my phone. Watching the sunset across Mt. Everest is one of the most memorable evenings I’ve ever had. I knew I needed to capture the moment. So using the Lightroom app I captured a DNG RAW file that I knew I could process later on and hopefully get enough quality to print from.
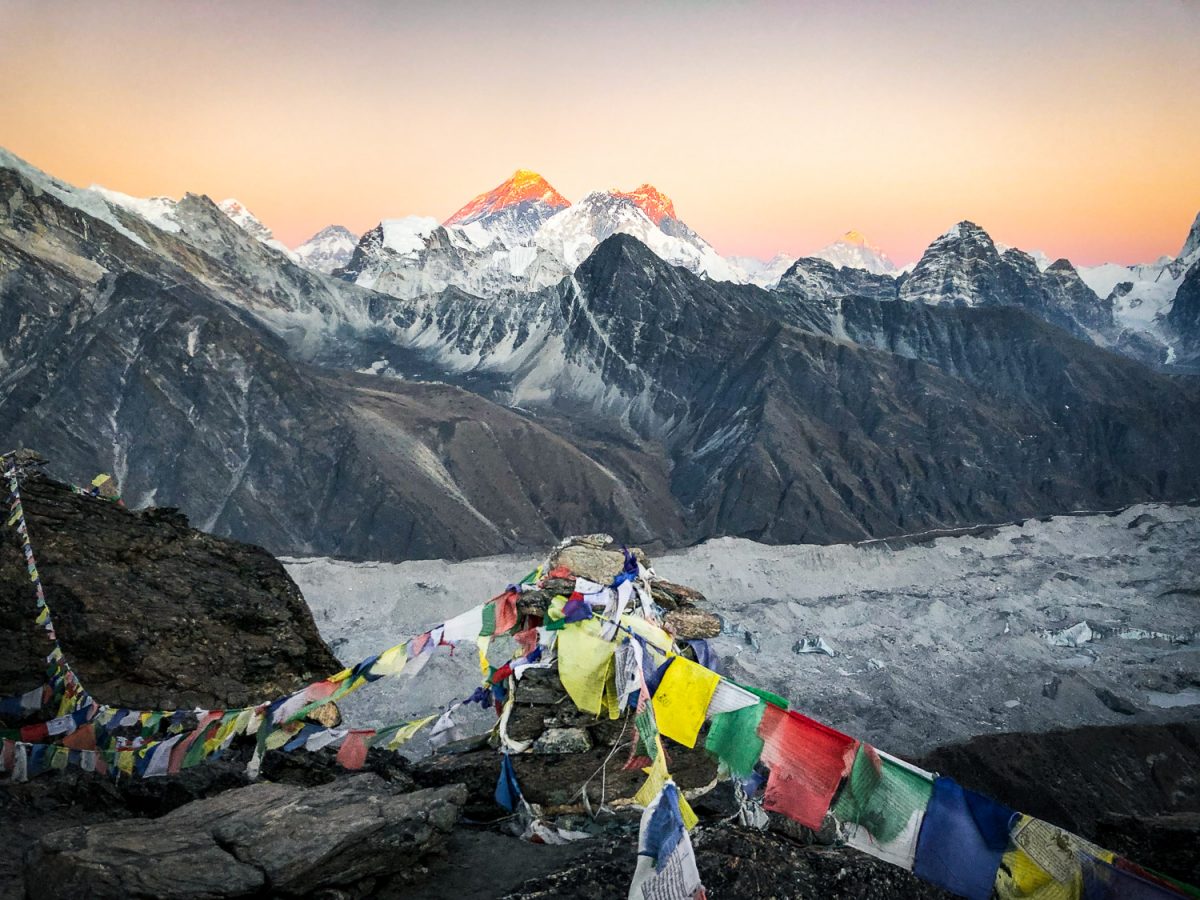
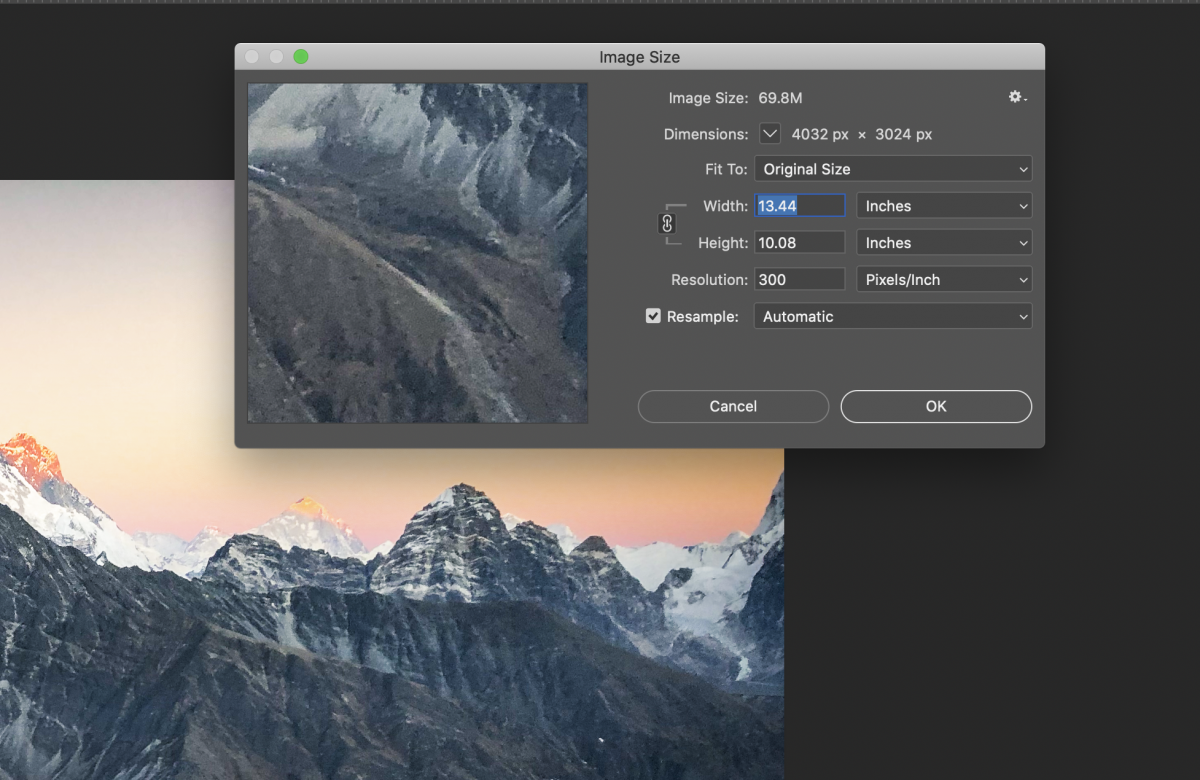
If I look at that digital file I can see the dimensions are 4032 x 3024 pixels. I captured this on an iPhone 8 which has 12 megapixels (for those that want to know). So if we check our maths, an image of 12 megapixels with these dimensions should let me print something optimally at 13.5” x 10”. Whilst not a massive, wall-filling piece of art, this size is still fantastic and comfortable and once framed with a passe-partout would make a brilliant piece for any wall.
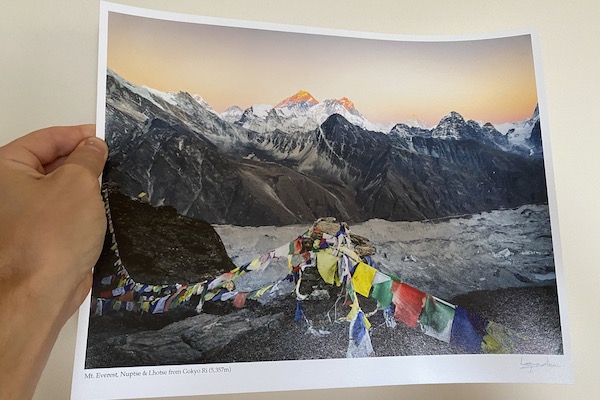
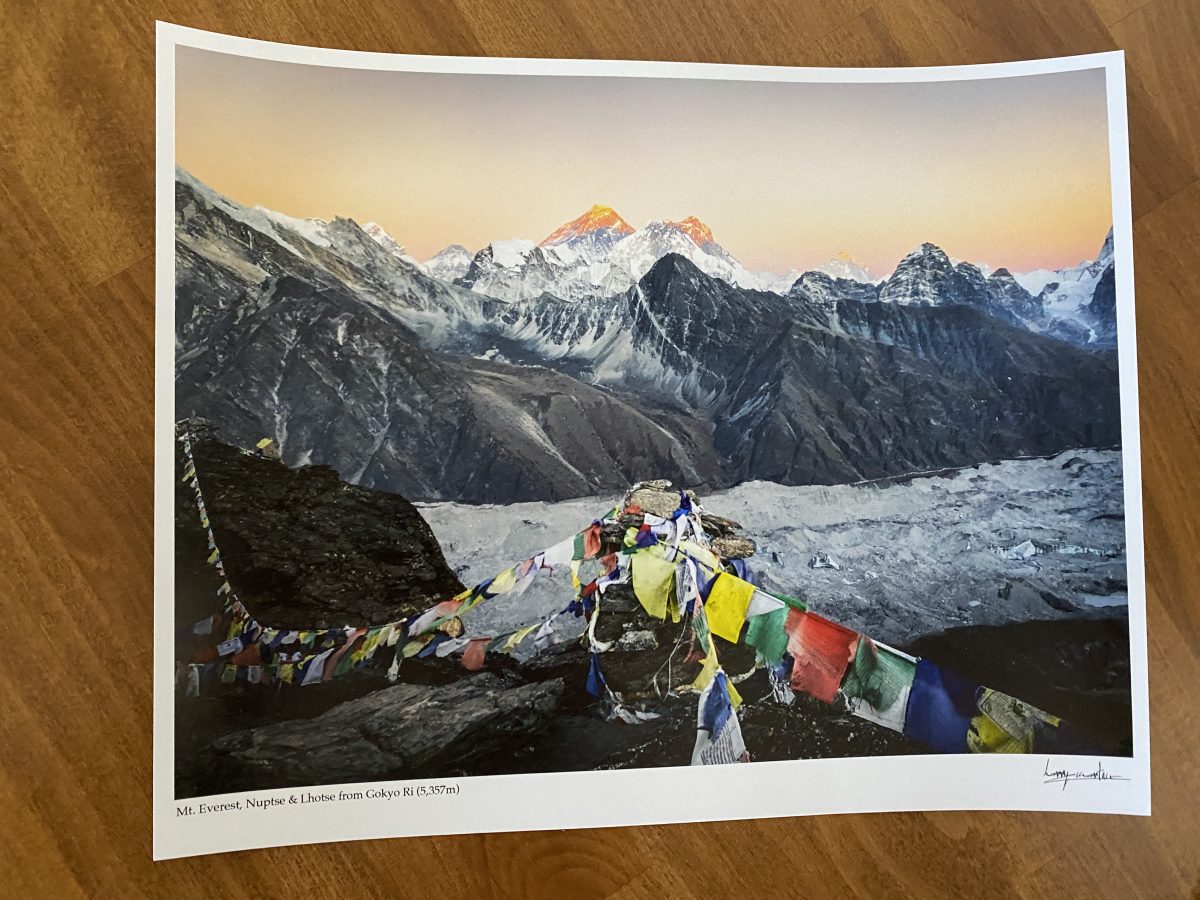
I printed this image recently, opting for a size of 12.5” x 10” (more on my choice of printing company etc below). The image is slightly smaller than those dimensions as I put a nice white border around it, as you can see below. Overall I was really impressed with the quality. If I examine the image with my nose pressed to the paper then yes, it does not look perfect, but no print is designed to be viewed this close. Hold it at arm’s length and it looks as intended, and pretty darn good.
Most mobile phones will enable you to print something in this size range straight out of the camera. For most people this is probably going to be big enough, especially if you plan to mount and frame it as well, which will add to the overall size.
Could I Print This Even Bigger?
I reckon so. There are many ways of enlarging your digital files to increase the size of your overall print. I’ve already mentioned that you can reduce the PPI value to increase the size of your print. However, you can only do this so much before you end up with a result of such poor quality that there is no point. I generally don’t recommend printing any lower than 200 PPI and would even hesitate at that. Instead, we can use the magic of computer software to scale up our digital file to help us out.
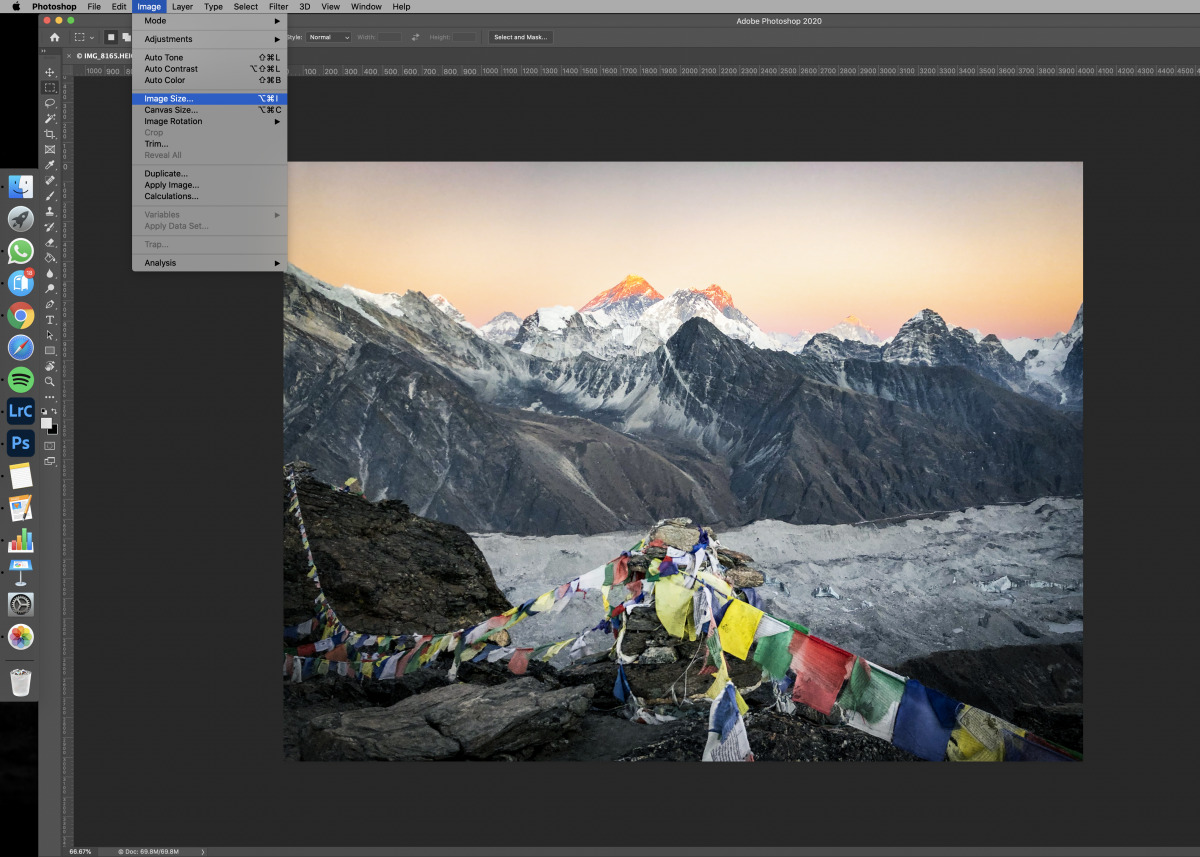
The easiest way to do this is in Photoshop. Simply navigate to Image > Image size. Here you can set the dimensions as inches, or cm, or whatever you prefer. Then just alter the values to get to your desired print size. As a guide, I would not recommend increasing the overall size of your value using this method by more than double, from say 13” to 26”. The method Photoshop uses to scale up your image fills in the gaps between pixels as you scale up. If you go larger than twice as big then you are basically getting more unoriginal content in your image than content that was originally there to begin with. That can result in images that start to look fuzzy, pixelated, suffer from a loss of sharpness and more. With an image captured on a mobile phone I would be even more restrained on increasing the size too much using this method as the imperfections in the file are going to be magnified a lot.
New software is being developed all the time, however, and another offering comes in the form of Topaz labs Gigapixel AI. It supposedly lets you enlarge an image up to six times the original size! Those are bold claims. I wanted to try it out for myself as I have been trying to find a way to get bigger and bigger prints all the time (and without using a super high-resolution camera). Gigapixel is very easy bit of software to get to grips with as there are just a couple of different buttons and functions. The only issue I stumbled across was the amount of time it took to generate the preview of the enlarged image – more down to my own computer than the software.
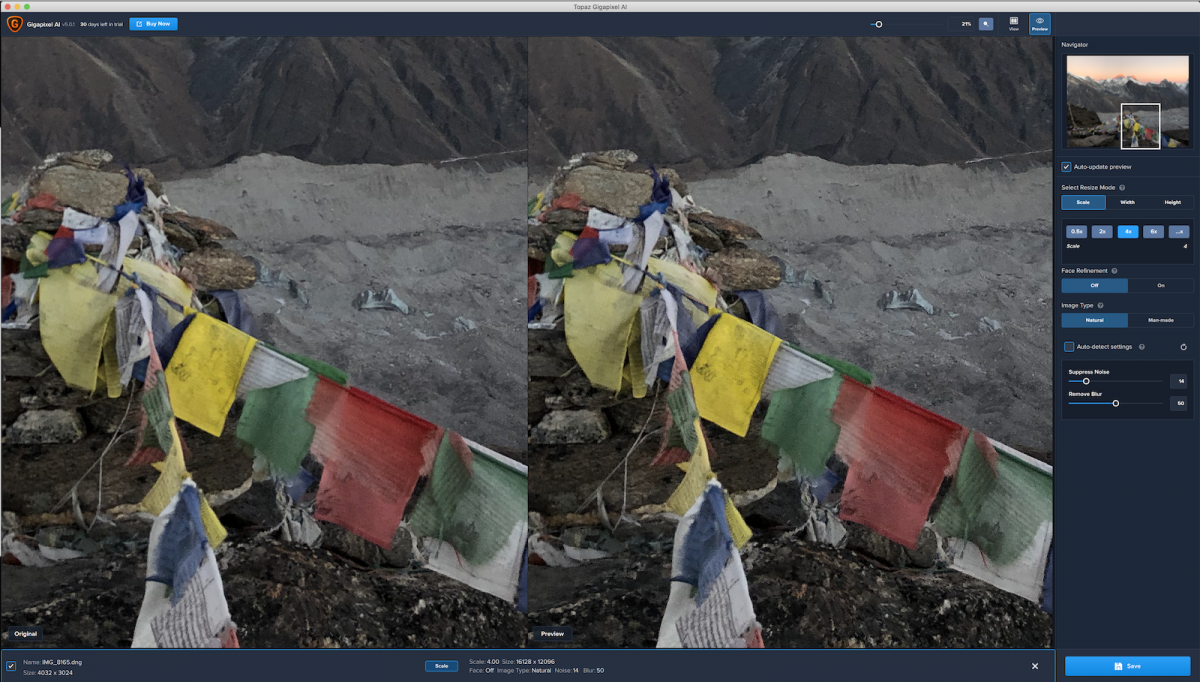
In truth I was really surprised how well the software seemed to work. I was pretty skeptical on how well a file could be enlarged like this, but I had trouble finding any fault in the scaled up image until I reached the 6x option. Both the 2x and 4x options looked spot on with no discernible decrease in quality. For such a simple bit of software this seems an invaluable way of eking out more from your digital files then would be possible using just Photoshop or nothing at all to get bigger better prints from your mobile phone. If you’re interested in trying out Topaz Gigapixel AI (or any of their other bits of software, I especially recommend their deNoise software) then click here for more information.
Printing
If you own your own fine art printer at home then storm ahead and get printing. By fine art printer I mean something that utilises acid free inks, typically prints larger sizes than A4, and has a much larger range of inks installed than your average home office printer (helping achieve saturated colours and true blacks). Owning and operating a printer like this is a pricey affair, but if you enjoy printing then it’s a great route to go down. I don’t own one of these and I send all of my images off to a professional print lab to be printed and sent back to me.
There are many print labs out there, ranging from very cheap options to full-blooded professional services aimed at pros organising galleries and exhibitions. At the budget end, you have companies such as Photobox, they are extremely affordable but as with so many things, you do get what you pay for and while results can be good, consistent good results are not guaranteed. I used Photobox for many years, however, as I printed and edited more, I noticed that all too often I was unable to match what I saw on my screen to the print that arrived at my door.
These days I get all my prints from The Printspace, a professional lab based in London. All the prints for sale in my online store are printed to demand from the Printspace and posted out to customers. They offer affordable but exceptionally high quality prints along with lots of other services such as framing and mounting. I am not going to delve into the different types of printing they offer, paper types etc, as that needs an entire post, or series of posts to comprehensively explain. I can however thoroughly recommend them, and if you’d like to give them a try you can even get 50% off your first order with them by using the code PV2JQOP.